
Editor Preferences#
Editor Preferences are used to change the default configuration of Unreal Engine in general. Settings there will be applied on all projects running under the same version of Unreal Engine. Editor preferences can be found in the top menu Edit ▸ Editor Preferences.
Settings related to Odyssey can be found in 8 sub-categories:
Odyssey - 2D Animation Editor#
In this category, you can configure your flips. This topic is covered in details in the Navigation part of the Animation 2D timeline.
Odyssey - Flipbook Editor#
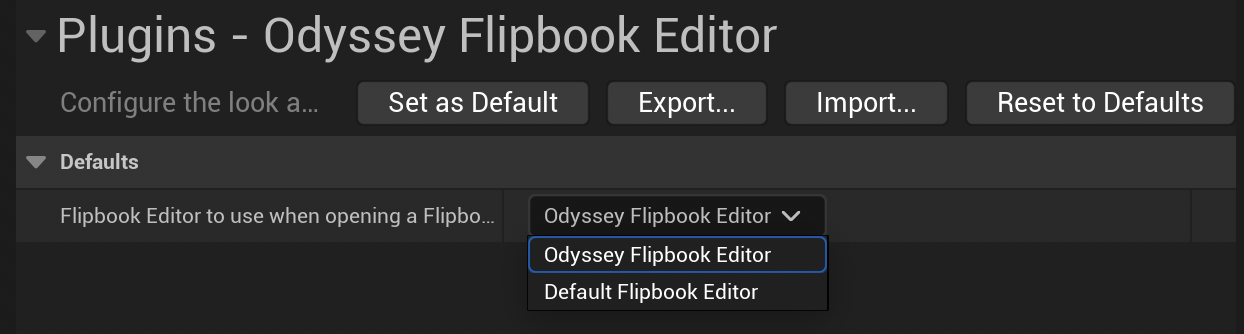
Here you can choose Odyssey as the default Flipbook Editor or change it for Unreal Engine default editor.
Note
You can also temporarily change the editor with a right click on the asset and select the option Edit With in the contextual menu:

Odyssey - Painter Editor#
This is the area to modify the canvas in all Odyssey related editors.
Viewport settings#
This area is used to configure what you see in the viewport, in any Odyssey editor:
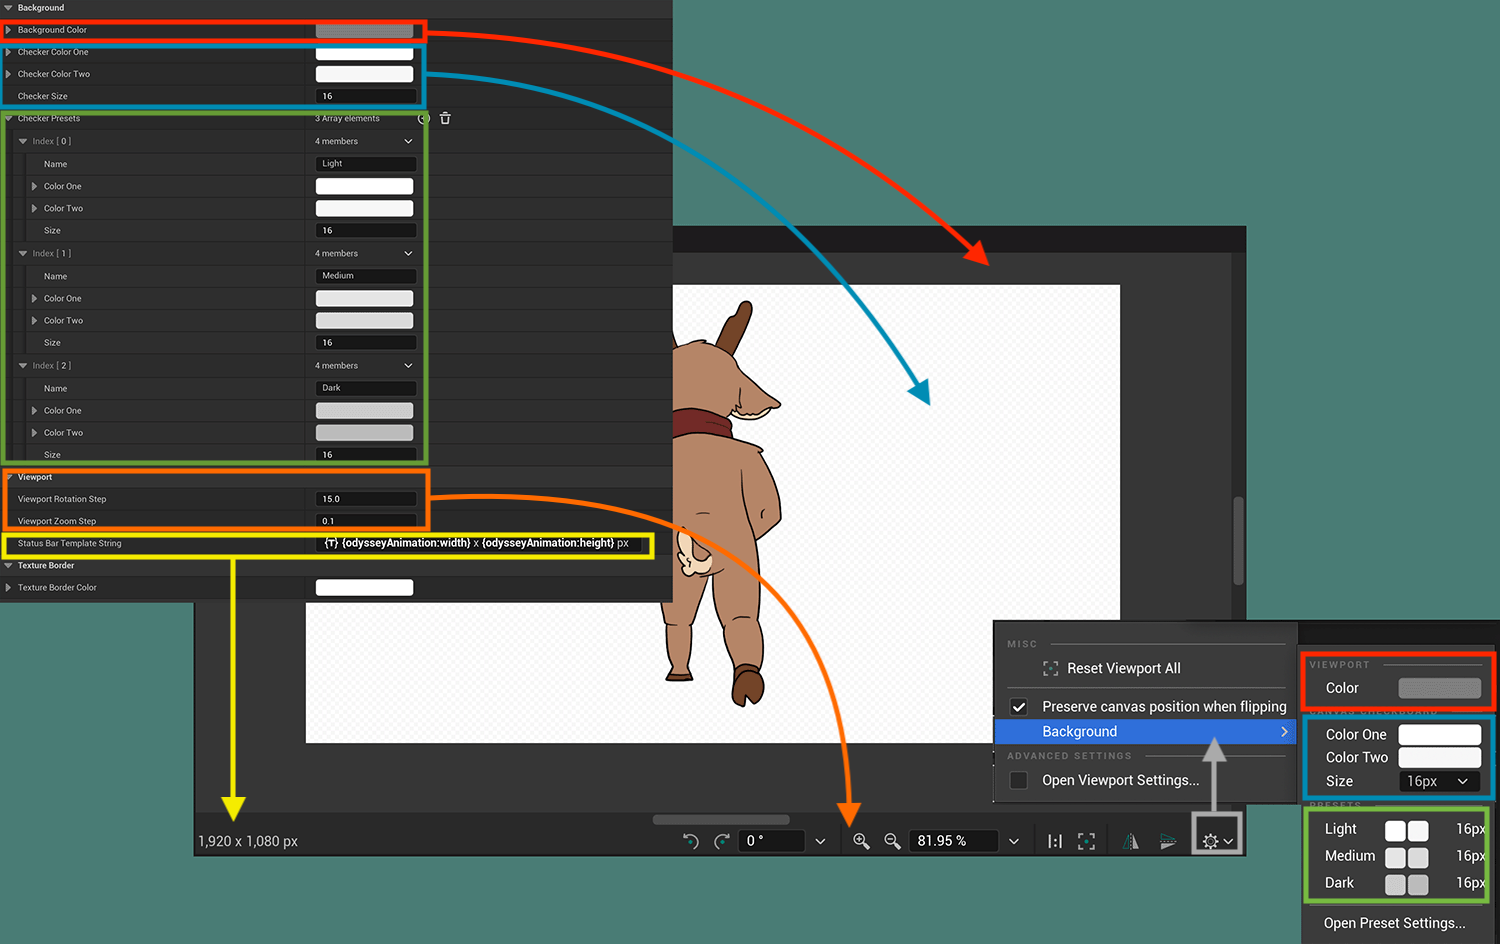
Background Color, Checker Color and Checker Presets can be easily selected or changed directly from an Odyssey Editor, by clicking on the gear icon.
Viewport Rotation / Zoom step are used to determine the step each time you will click on the Zoom icons or the Rotation icons, at the bottom of the viewport.
Status Bar Template String is used to choose what information you want to display at the bottom-left corner of the viewport. By default, only the side of the Texture 2D or Animation 2D is shown, but you can use many other patterns:
{yyyy}
{mm}
{dd}
{24h}
{min}
{sec}
{odysseyAnimation:width}
{odysseyAnimation:height}
{odysseyAnimation:name}
{odysseyAnimation:currentLayerName}
{odysseyAnimation:framerate}
{odysseyViewport2d:x}
{odysseyViewport2d:y}
{odysseyViewport2d:r}
{odysseyViewport2d:g}
{odysseyViewport2d:b}
{odysseyViewport2d:a}
Note
Any modification will be visible immediately in your Viewport!
TextureBorder Color is not used.
Pointer#
You can then either change the Default Brush used each time you open an Odyssey Editor on a Raster Layer, and the shape of the Tool Mouse cursor.
Note
Note that the shape of the Tool Mouse Cursor will have a fixed size and won’t get any larger or smaller.
Odyssey - Storyboard Naming Convention#
In the lesson Create Board a Board Sequence, you had the possibility to choose the naming convention of your storyboard. In production, naming convention is extremely useful for a better efficiency. Let’s see in details the different options.
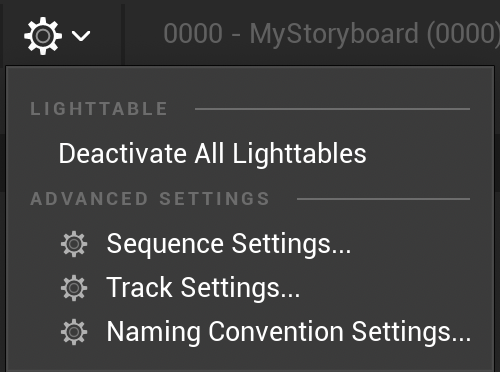
By the way, Naming Convention Settings can also be found in a menu from the Sequencer, when clicking on a icon with a gear:
Global & User#
Here you can add information about your studio, the license & production you are working on, what season & episode it is, etc. All these information can be used then in patterns for Board, Shots, Planes and Cameras.
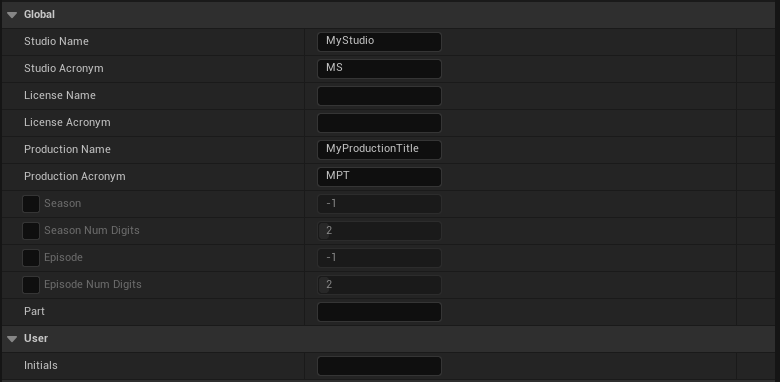
In the User section, you can enter your initials or your full name.
Board#
Define here the Board Naming Convention by entering a pattern in the text field.
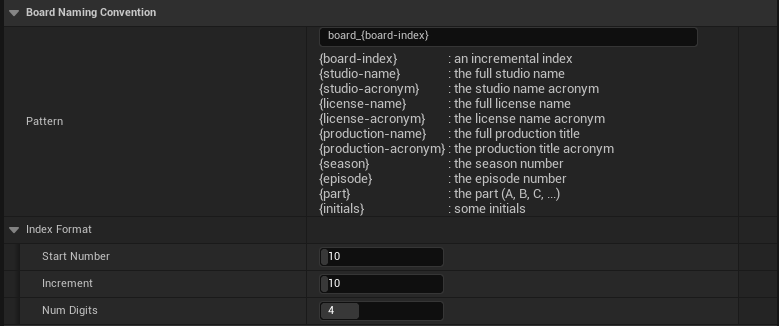
In the section Index Format, you can precise the starting number, the increment and how many digits will be used.
Shot#
Define here the Shot Naming Convention by entering a pattern in the text field.
In the section Index Format, you can precise the starting number, the increment and how many digits will be used. You will also find a section Take Format with similar settings. Takes will be explained in the Advanced section.
Plane#
Define here the Plane Naming Convention.
In the section Index Format, you can precise the starting number, the increment and how many digits will be used.
Camera#
Define here the Camera Naming Convention.
In the section Index Format, you can precise the starting number, the increment and how many digits will be used.
Odyssey - Storyboard Sequence Editor#
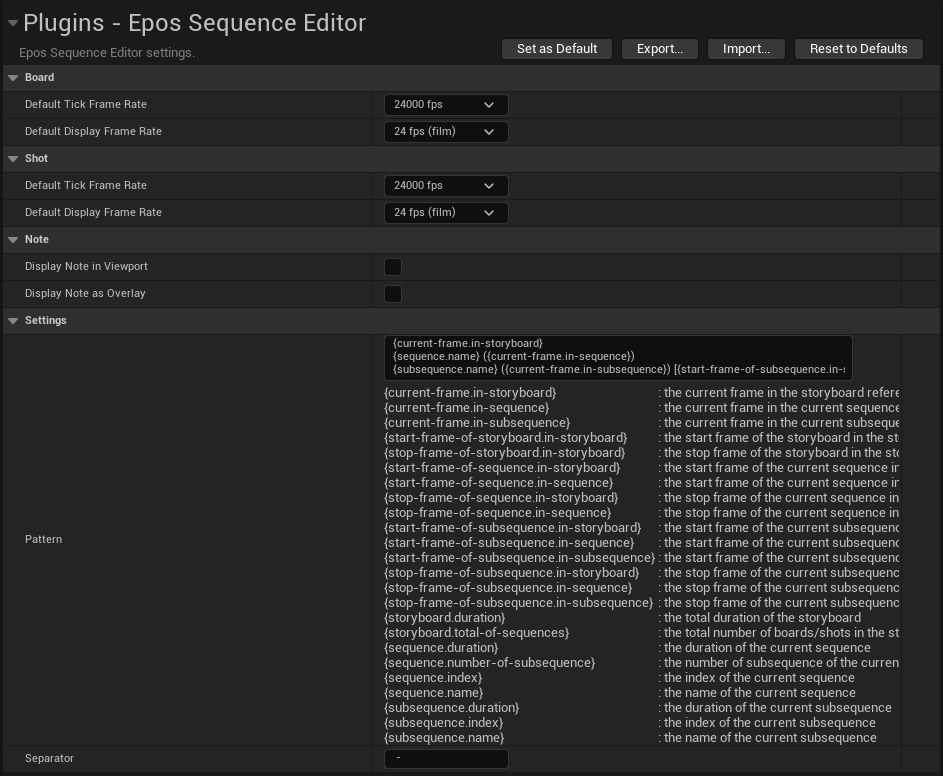
Options in the Sequence Editor will allow you to change the Tick Frame Rate and the Default Frame Rate of Board and Shot Sequences.
You can also force Notes to be displayed in the Viewport or as an Overlay (see lesson Notes).
The last section shall be used to change the name displayed at the top of the Sequencer, depending on the cursor’s position:
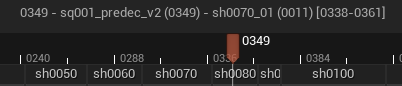
By the way, Sequence Editor Settings can also be found in a menu from the Sequencer, when clicking on a icon with a gear:
Odyssey - Storyboard Tracks Editor#
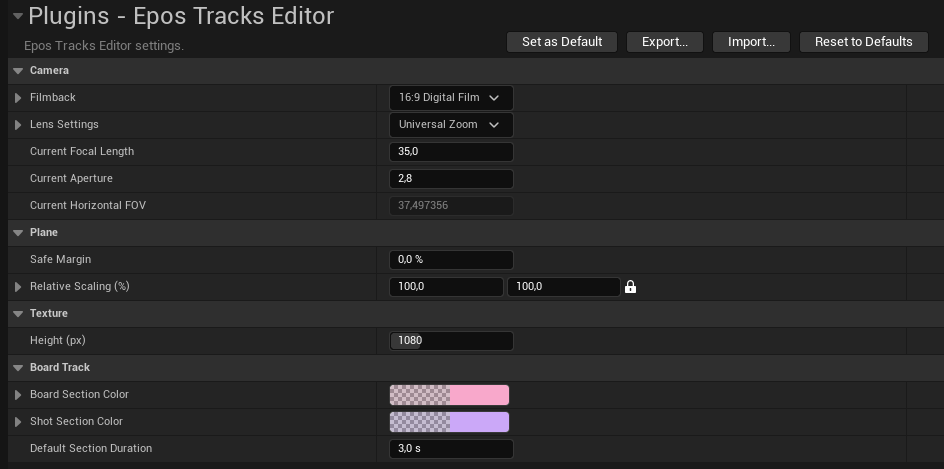
This panels allow you to configure:
Camera Actor’s options (Filmback, Lens Setting, Focal Length, Aperture), which is based on default parameters or the last configuration used when adding a new Camera.
Safe Margins and Relative Scaling of Planes (default parameters or the last configuration used when adding a new Plane)
The Heigth of Planes (default parameters or the last configuration used when adding a new Plane). Remember that the width is automatically calculated on the Camera ratio.
Board & Shot Section colors.
The default duration of Sequences in seconds.
Tip
The way the menu are collapsed or uncollapsed in Storyboard Tracks Editor affect the way the options are shown when adding a Camera Actor and a Plane Actor.
By the way, Tracks Editor Settings can also be found in a menu from the Sequencer, when clicking on a icon with a gear:
Odyssey - Stylus input#
In this category, you can change information about the Stylus driver.
Note
Only Windows OS users might need you to switch here. Mac OS users will always be using NSEvent.
Windows Ink - RealTime Stylus: default mode on Windows. Will be compatible with all brands of tablets: Microsoft Surface, Huion, Gaomon, XP-Pen, Xencelabs and Wacom Tablets with the Ink mode activated.
Wintab: mode that will only works with tablets that offers the option to disable the Windows Ink mode. Wintab offers the best API, but it not compatible with all brands.
Note
You will have to close all instance of Odyssey running after changing the Stylus input.
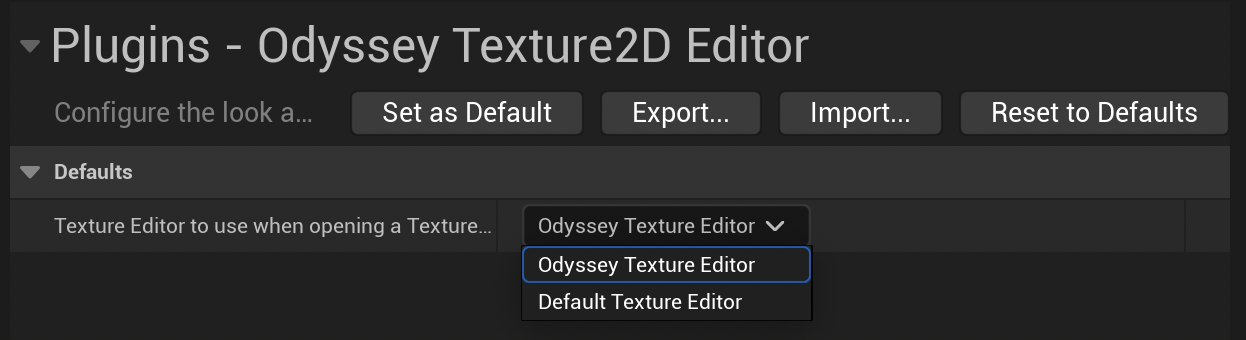
Odyssey - Texture 2D Editor#
Here you can choose Odyssey as the default Texture 2D Editor or change it for Unreal Engine default editor.
Note
You can also temporarily change the editor with a right click on the asset and select the option Edit With in the contextual menu:
