
Using Animation Actors#
Manual addition#
If you added an Animation 2D to the Level, the Animation Actor can be played at a specific moment within a Level Sequence. To do so:
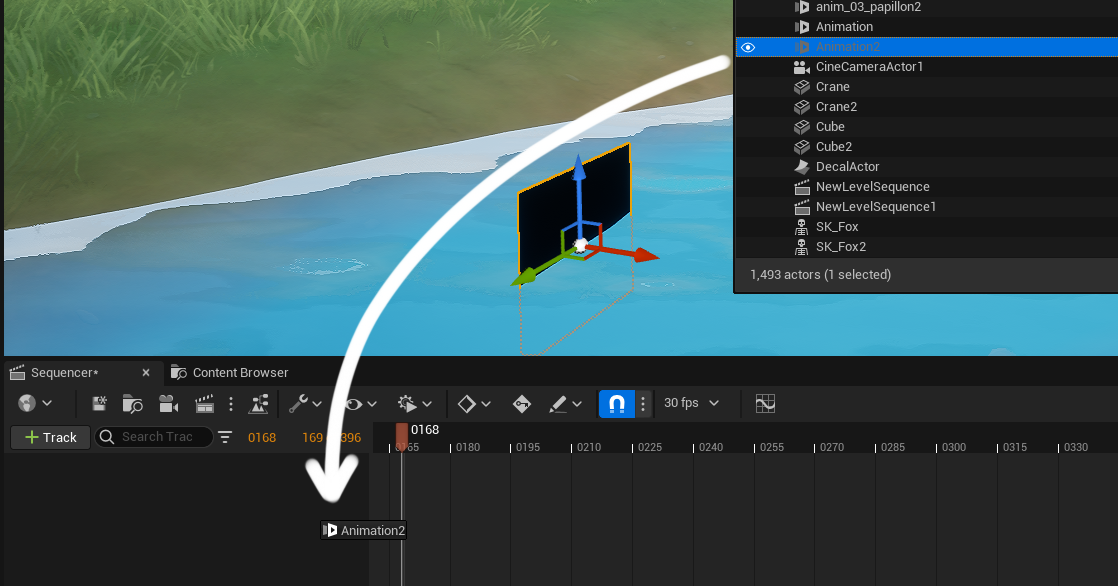
Drag and drop the Animation Actor from the Outliner to the Level Sequence to create an Animation Track.
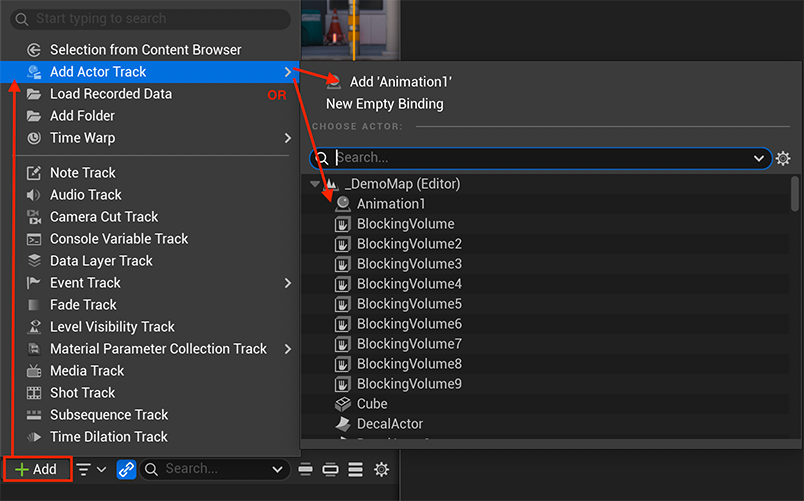
Or add the track directly from the Sequencer:
You can then change the position of the Animation Actor Track, or modify its duration:
Tip
If you need to add extra Cells, make sure you increased the duration of the Animation Actor Track!
Note
Many shortcuts lie R and T or Flips will work in that context!
If the animation needs to face a camera, there are 2 ways to achieve what you want. The method to use will depend on the binding you will need (Possessable or Spawnable).
Note
Possessable Actors can only be parented to other Possessable Actors. Swpanable Actors can only be attached to other Spawnable Actors.
Keep this in mind!
Possessable Animation + Camera#
First, follow these steps to create a Cine Camera Actor.
After adding a Cine Camera Actor to the Level, add it as a Track in the Level Sequence (drag and drop it) or use the button + Add at the top left corner of the Sequencer.
You will obtain this result:
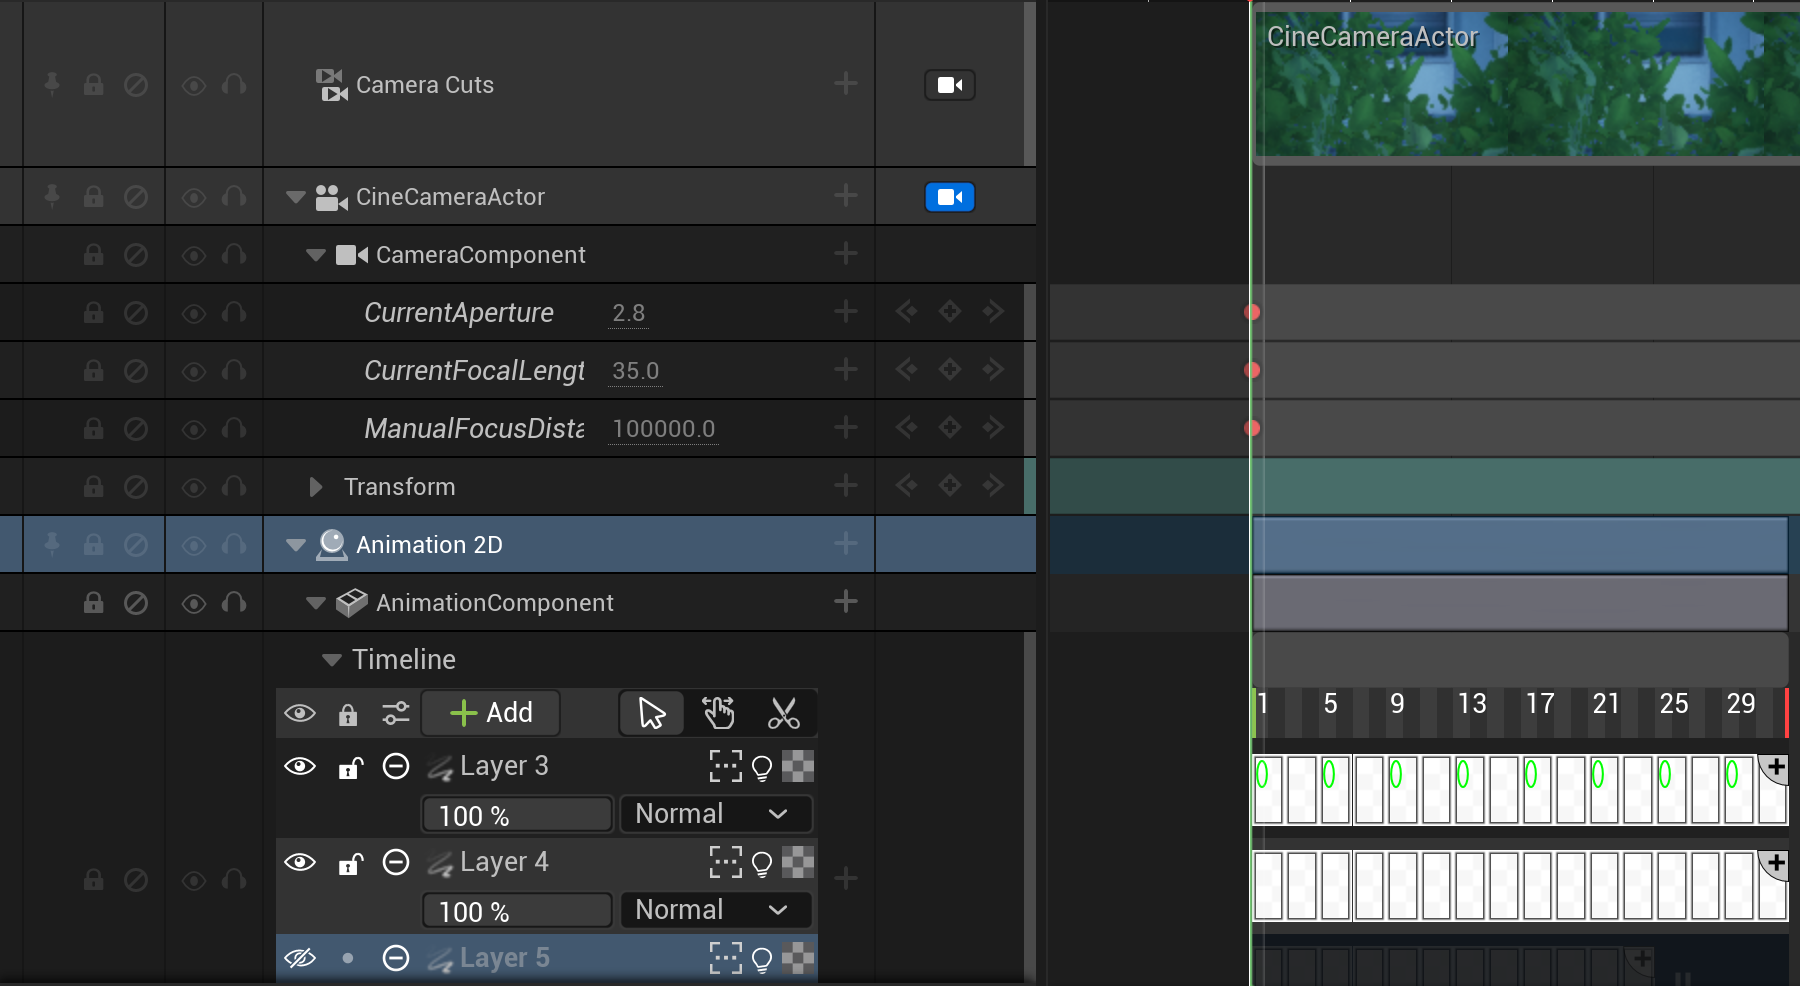
In the outliner, drag and drop the Animation 2D to parent it to the Cine Camera Actor:
Then, reset the location and angle of the Animation 2D Actor in the panel Details, before playing on the depth of the Animation 2D Actor:
Congratulations! Now your Animation 2D Actor will follow your camera’s POV!
Spawnable Animation + Camera#
You can automatically create a Spawnable Cine Camera Actor by clicking on this icon at the top of the Sequencer:
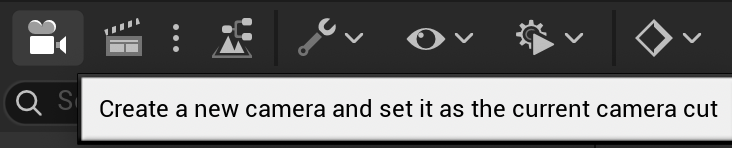
You will nhave then to change the binding of the Animation 2D Actor Track and make it a Spawnable too. To do this, right click on its main track and change the binding:
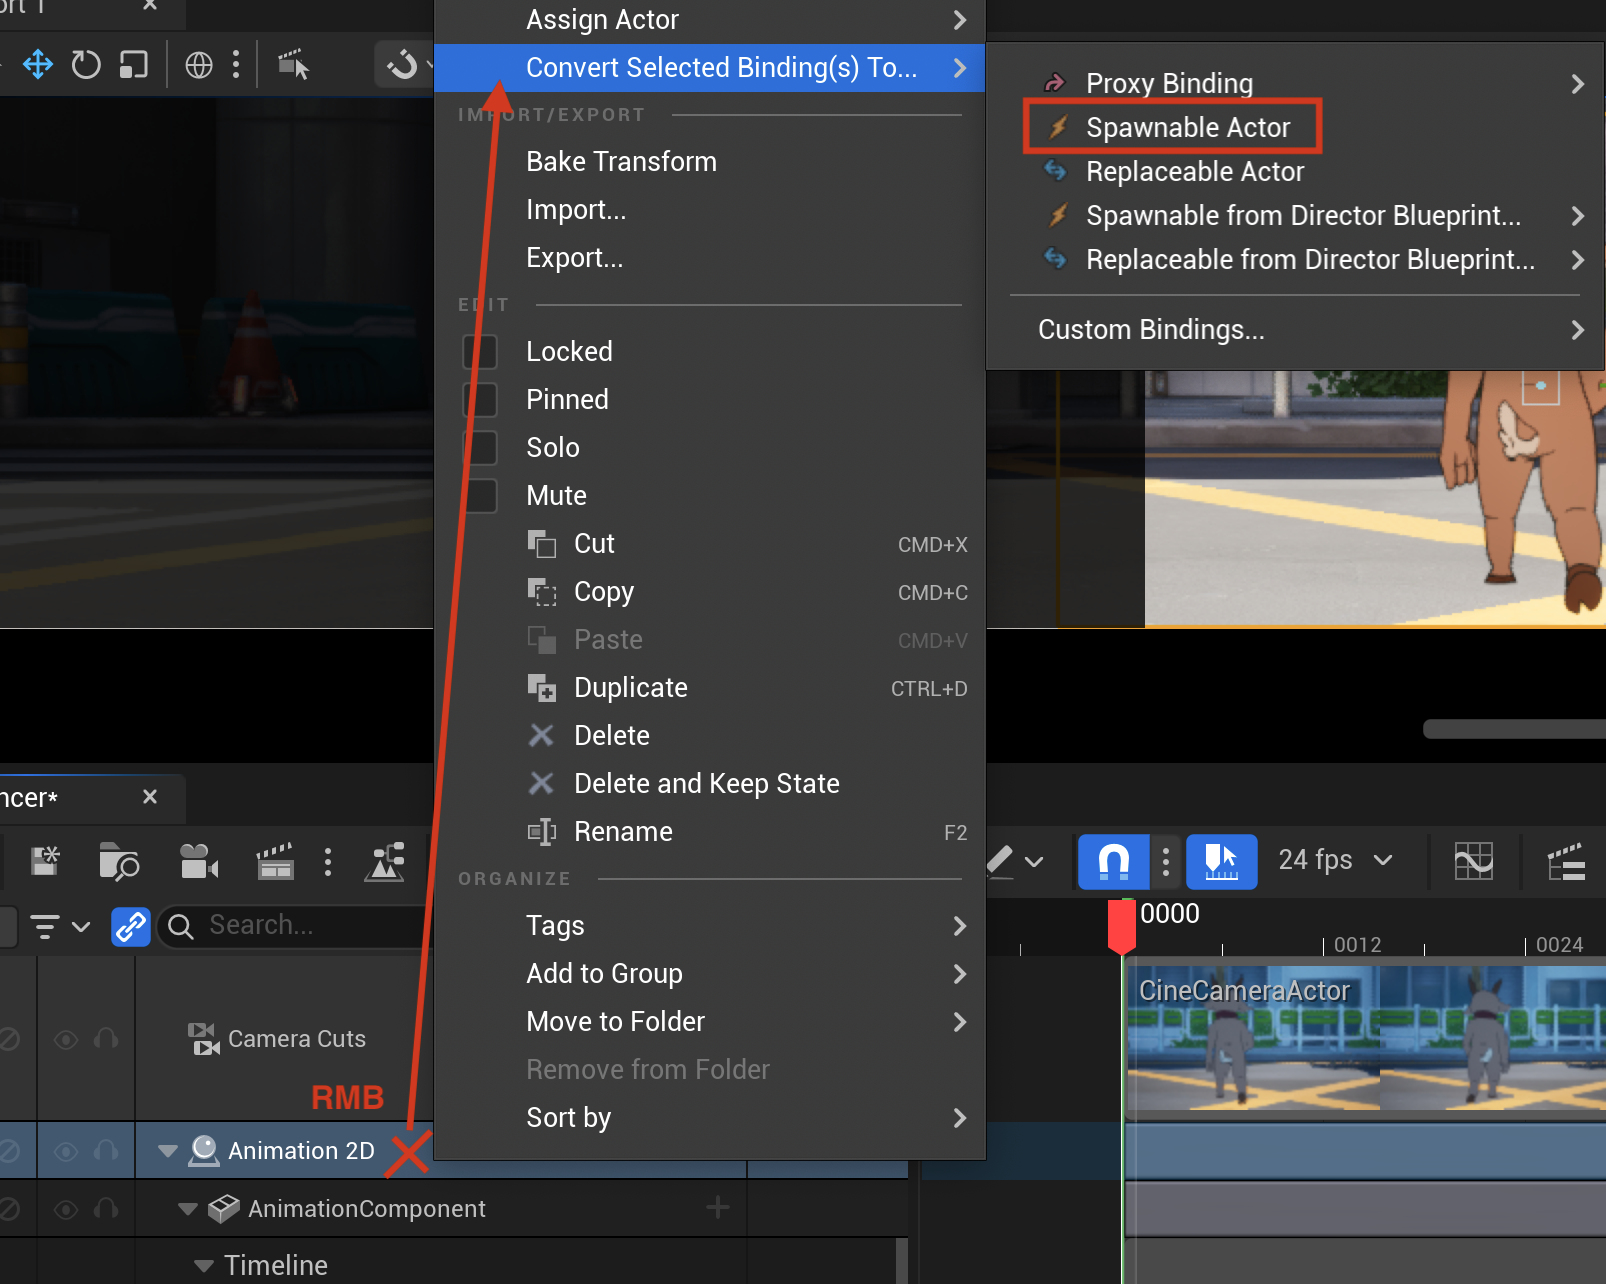
You can then click on the + icon on the main track of the Animation 2D Actor Track to Attach it to the Cine Camera Actor.
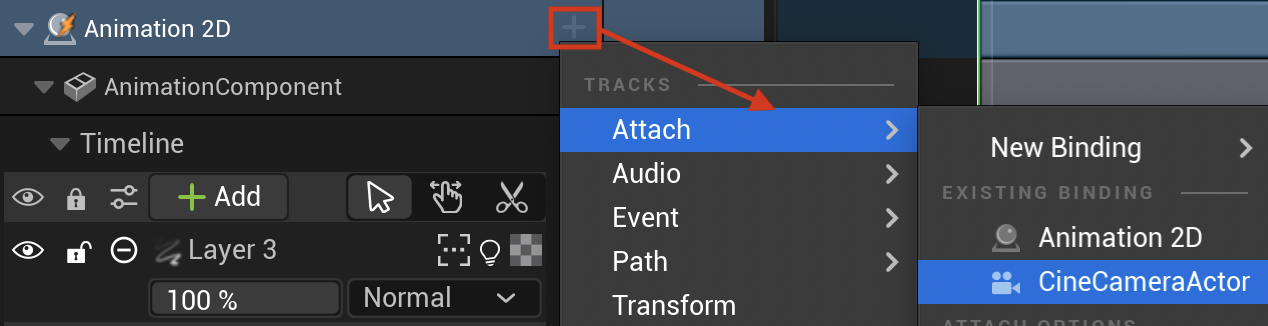
Then, reset the location and angle of the Animation 2D Actor in the panel Details, before playing on the depth of the Animation 2D Actor:
Congratulations! Now your Animation 2D Actor will follow your camera’s POV!
Using Constraints#
Whatever if you use Spawnable or Possessable Actors, you can also use a mechanism from Unreal Engine named “Constraints” to force an Animation 2D Actor to follow a Camera or look at it, without attaching or parenting it.
This mode is more complexe than the 2 previous one, but has the advantage to be more flexible, as you can add key to enable and disable the binding between the animation and the camera.
Follow the instructions above (possessable or spawanable) and:
create a Level Sequence
add a Cine Camera Actor to the Level and to to the Level Sequence
then add an Animation 2D to the Level in front of the camera’s POV to make sure the animation faces the camera.
Don’t forget to add then the Animation 2D to the Level Sequence.
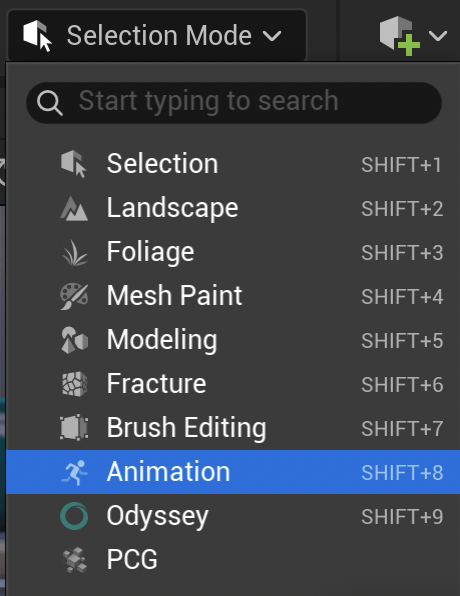
Change the Level Editor Mode and choose “Animation”:
In the Animation panel, select the Constraints tabs:
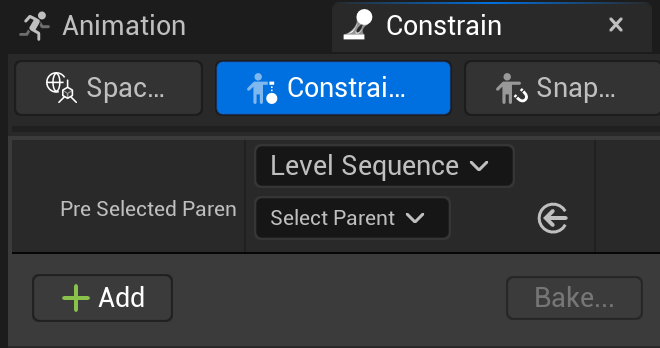
After making sure you selected the Animation 2D Actor from the Level or Level Sequence, click there to select the constraining parent (the camera):
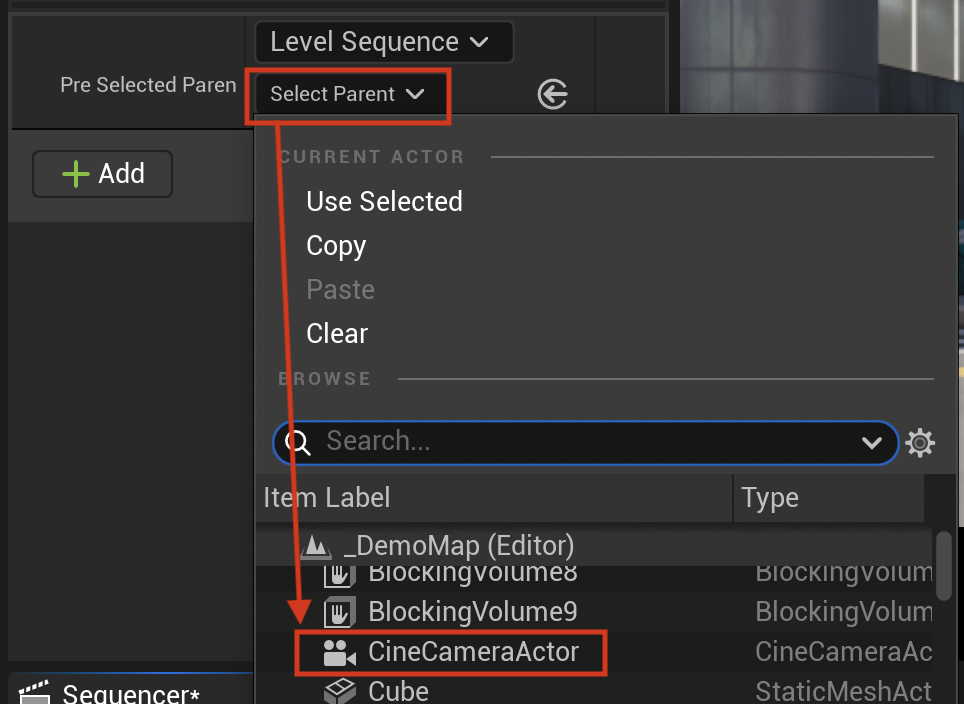
Add one or several constraints:
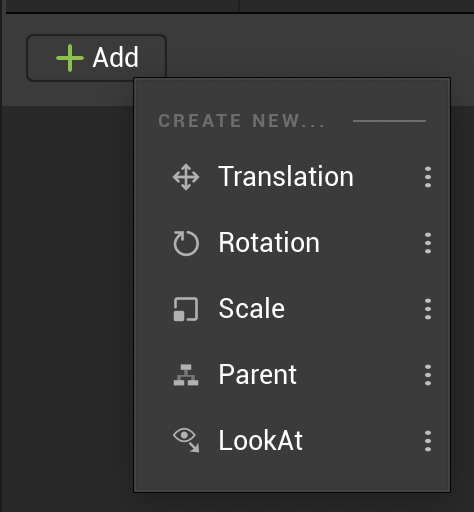
You can then manage keys to switch on and off the constraints.
Note
Constraint keys shall only be added or removed from the Animation Editor Mode, not from the Level Sequence:
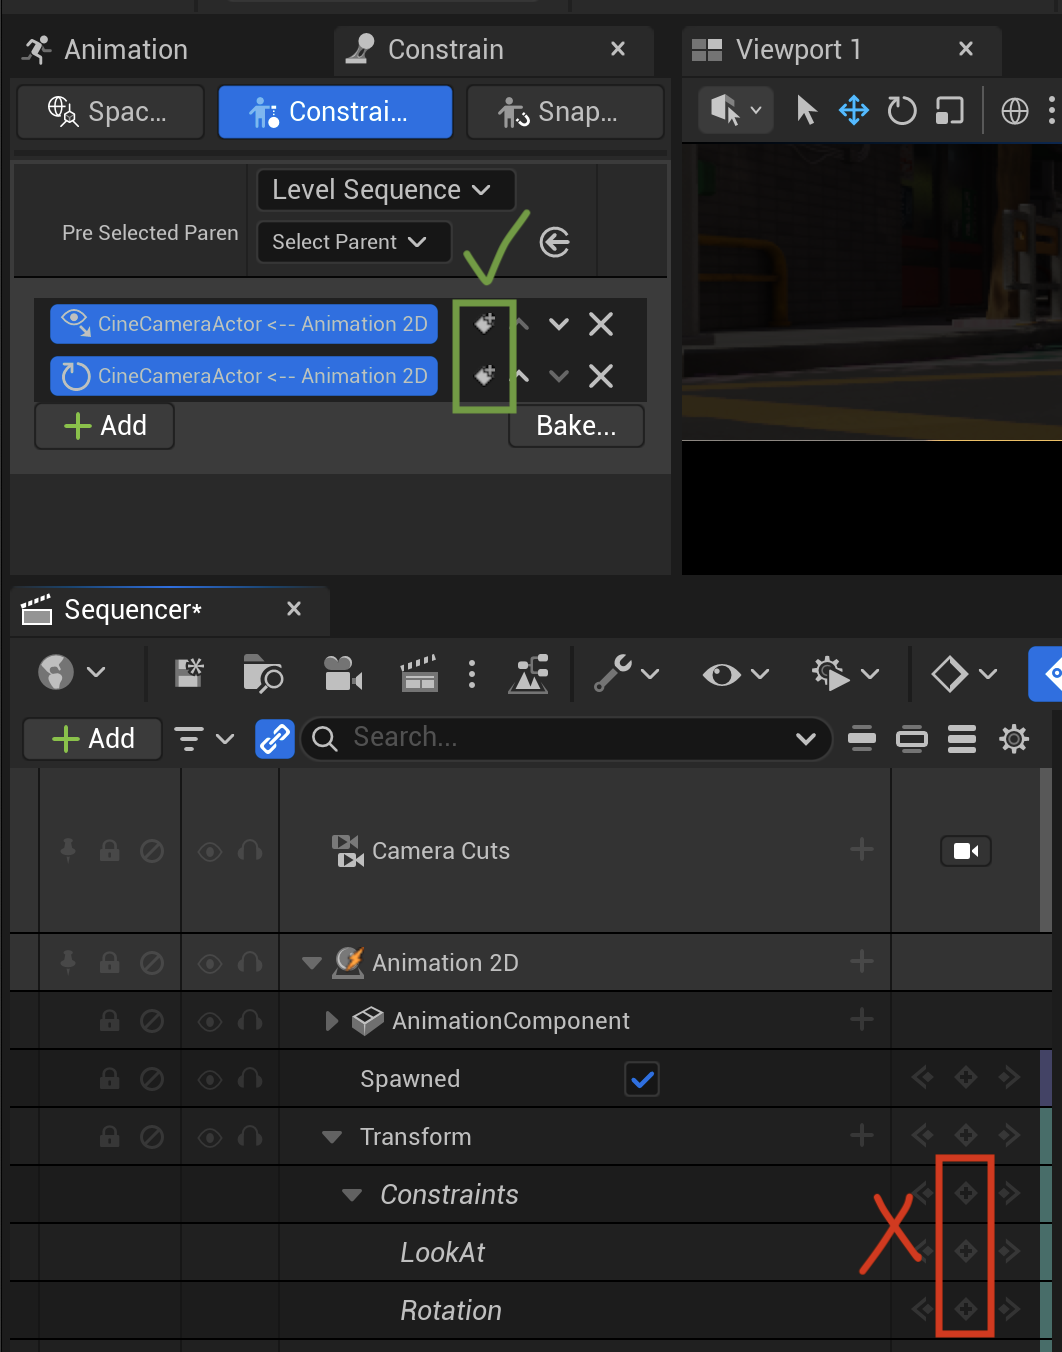
Here is an example of a 2D animation parented to the camera thanks to a Constraint. In the video below, the Constraint is turn off at some point (the camera keeps moving forward while the animation stays at the same place), then the Constraint is enabled to follow again the camera move:
Tip
Combine “Look At” + “Rotation” if you need an animation to remain at the same place, yet always facing the camera view to prevent perspective distortions.
Quickstart Widget#
This widget can be found in the Content folder of Unreal Engine, in the following path “Plugins ▸ Odyssey ▸ Widgets”
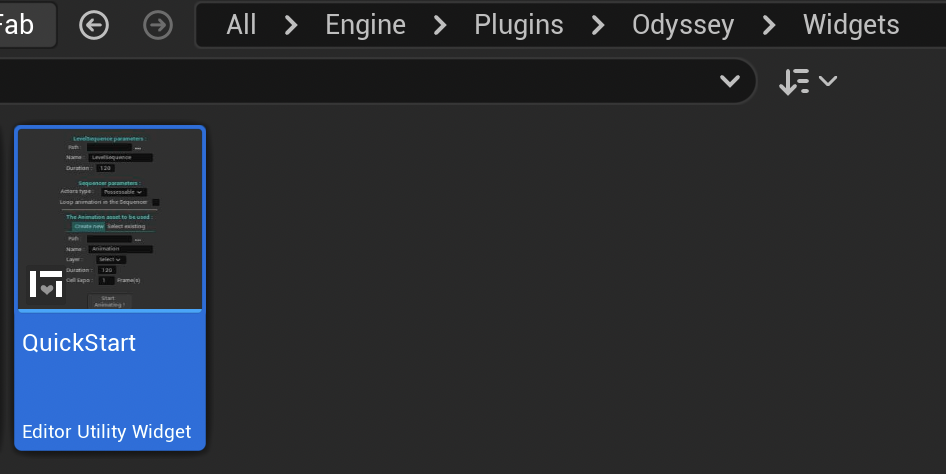
Make a right click on this widget to display it as a panel.
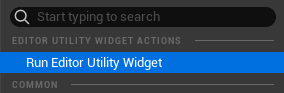
It will open the widget:
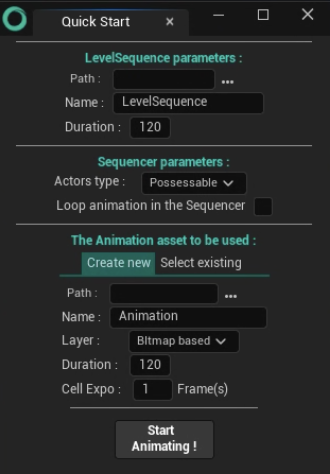
In the part “Level Sequence Parameter” select the path to create the asset Level Sequence, its name and its duration in frames
In the part “Sequencer parameters”, select the Actors type Possessable or Spawnable and if the animation should be in loop.
In the part “The Animation asset to be used”, you can either Create new or Select existing.
If creating a new Animation asset, choose its path in the Content Browser, its name, its layer type (Bitmap or Vector), its duration in frames and its cell exposure in frames.
If using an existing Animation asset, choose it in the dropdown menu.
Click on “Start Animating!”
Warning
At the moment, the Spawnable mode is broken.