
Tracks#
There are numerous types of tracks you can use with Odyssey.
Track list |
Asset type |
|---|---|
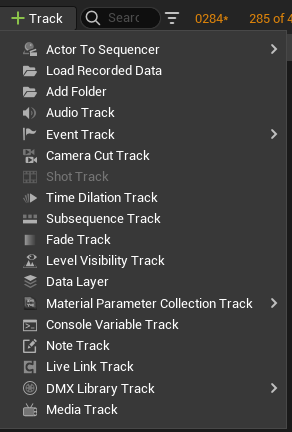
|
Level Sequence |
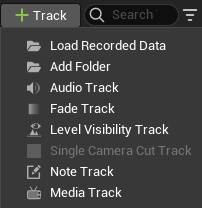
|
Shot Sequence |
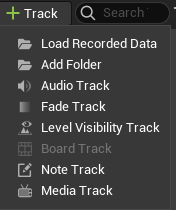
|
Board Sequence |
Note
This documentation is a summary of the most used tracks in the Sequencer. We advise you to read Unreal Engine 5.4 guide to know more about tracks.
Actor to Sequencer#
This option will bind an Actor from the Level to the current Level Sequence:
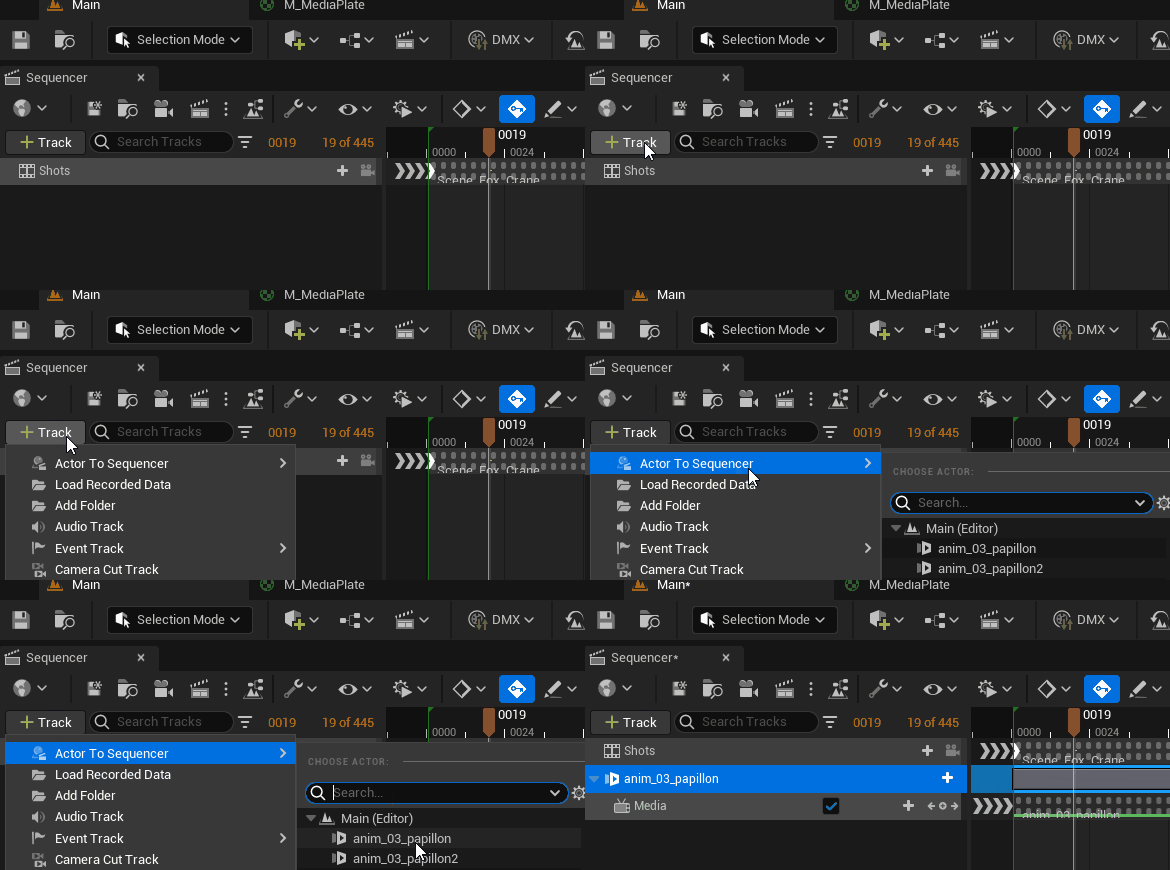
Note
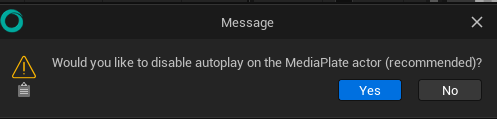
When using a Media Plate, you will be displayed this panel. Answer “Yes” if you want the animation from the Media Plate to be played at a specific moment. Answer “No” if you want the animation from the Media Plate to keep the Autoplay mode in the Level.#
How to add Actors in a Storyboard?#
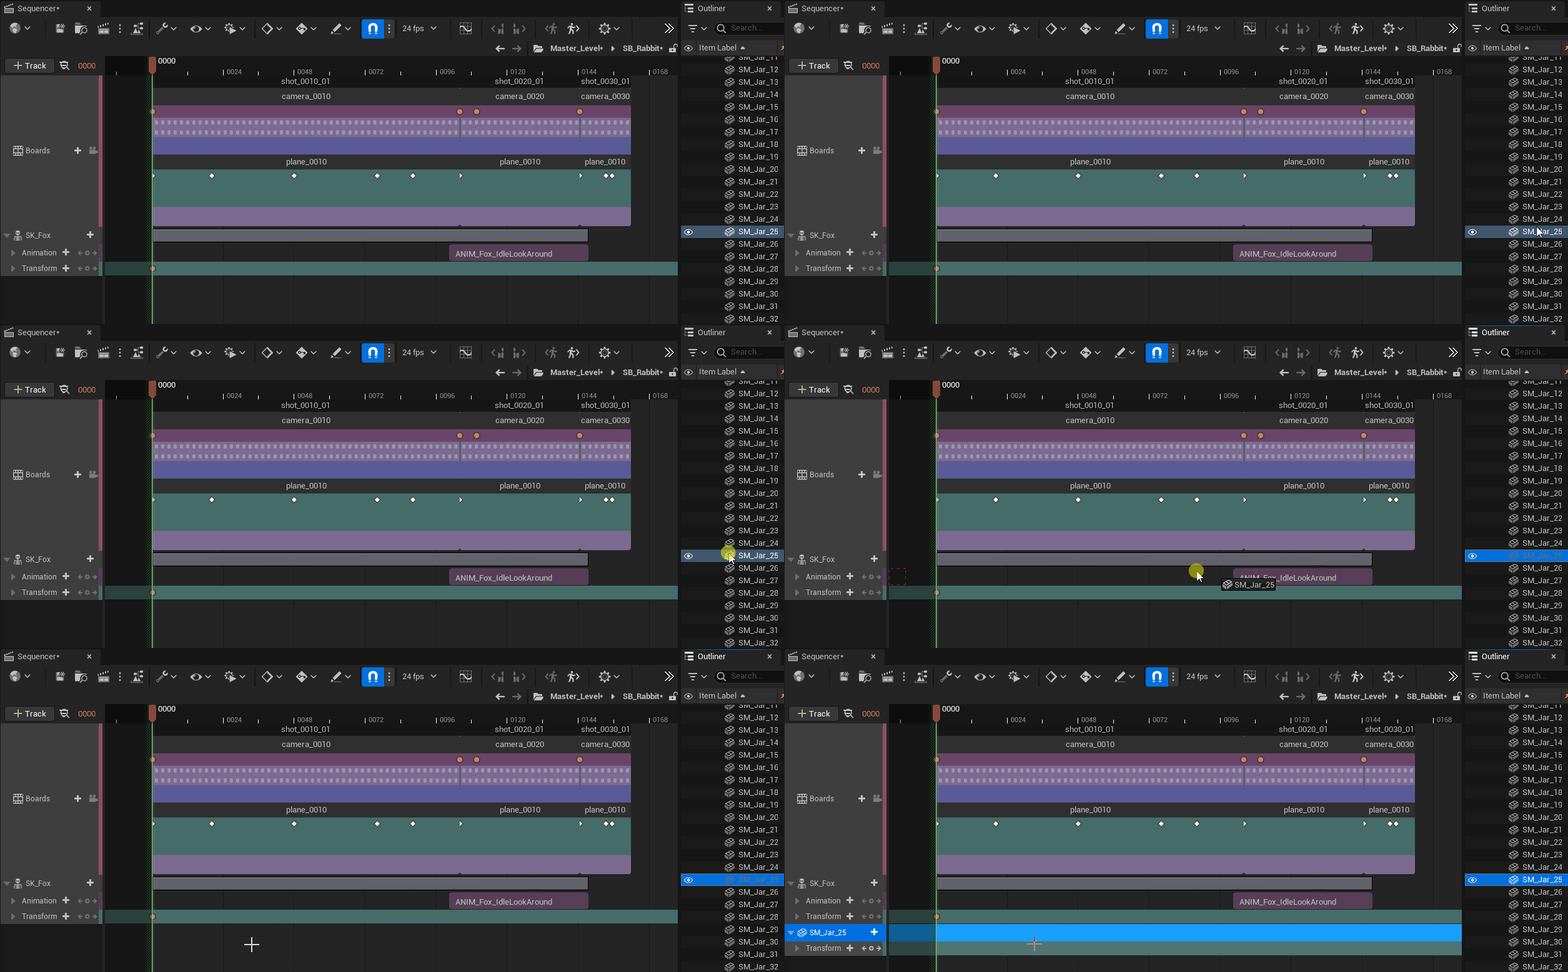
When working with a Board Sequence or a Shot Sequence, the option “Actor to Sequencer” does not exist. However, you can still use un Actor from a Level with a simple drag and drop from the Outliner to the Timeline area.
Note
When working with Board and Shot Sequences, the types of Actors are limited. For instance, you can use Static and Skeletal Meshes, but you cannot use Blueprints.
Folder#
Folder can be used to organise various tracks together.

Audio Track#
Before using an Audio Track, you will have to import the sound in the Content Browser. Then you can simply drag and drop the Audio Track into the Sequencer.
We advise you to read Unreal Engine guide to know more about Audio Tracks.
Camera Cut Track#
Camera Cut Track shall be used to bind a CineCamera Actor to a Level Sequence.
When working with a Shot Sequence, Camera Cut Track are automatically created when adding a camera. (Read the lesson about Storyboard Sequences)
Shot Track#
Shot Track will allow you to use a sequence within another Level Sequence that is used as a “Master” sequence. Using only Shot Track will be then quite similar to an editing software, since you will have the possibility to organise the order of your sequences or change their time scale to be played faster or slower. And like an editing software, the sequence played in the viewport is the upper track.

The icon “Lock Camera” will allow you to automatically “jump” from a CineCamera Actor view to another.
Note
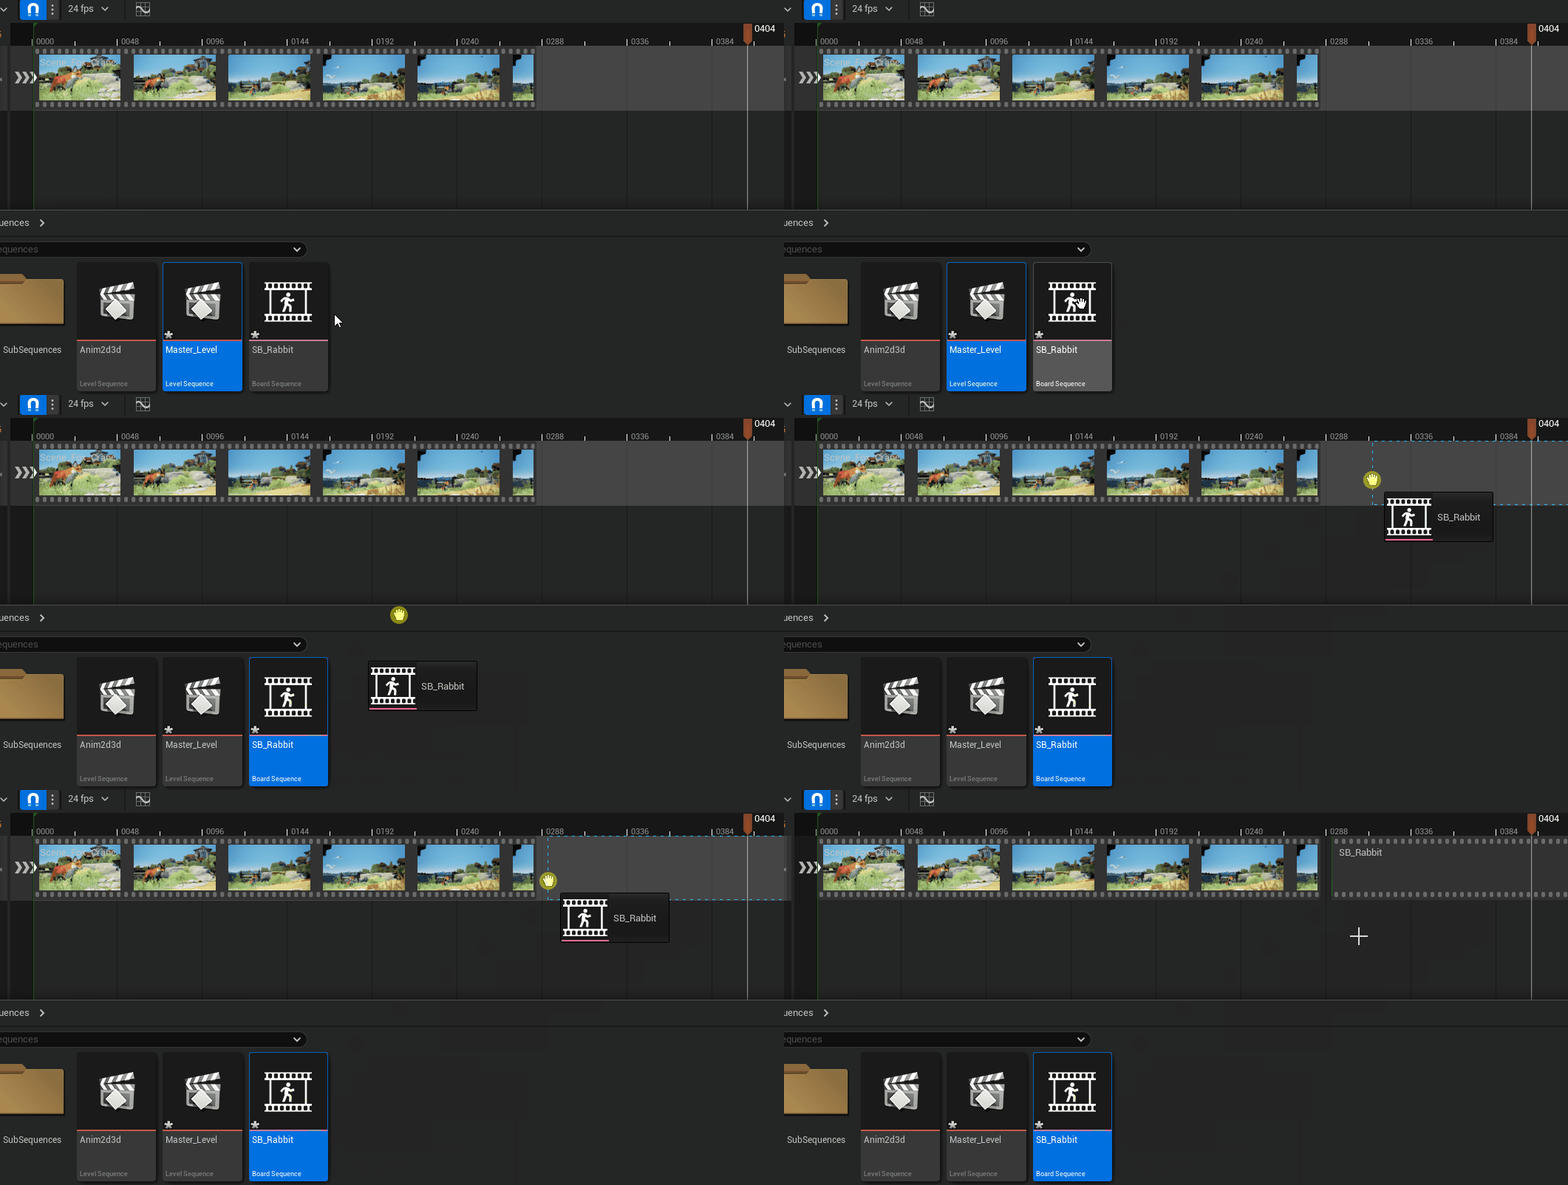
By default, only Level Sequences can be added in Shot Tracks. To add a Board or Shot Sequence, you must first add a Shot Track, then drag and drop the Board / Shot Sequence in the Timeline area.
Note
For more details about Shot Tracks, we advise you to read this documentation on Unreal Engine.
Subsequence Track#
In large-scale cinematic productions, it is necessary to have multiple artists working on the same shot at the same time (3d animation, lighting, VFX, camera action, etc.) The Subsequence Track enables this type of workflow by allowing additional sequence assets to be contained within the same sequence. Subsequences can also be used to organize your scene so that repetitive tracks and content are partitioned away into their respective disciplines’ subsequence.
Note
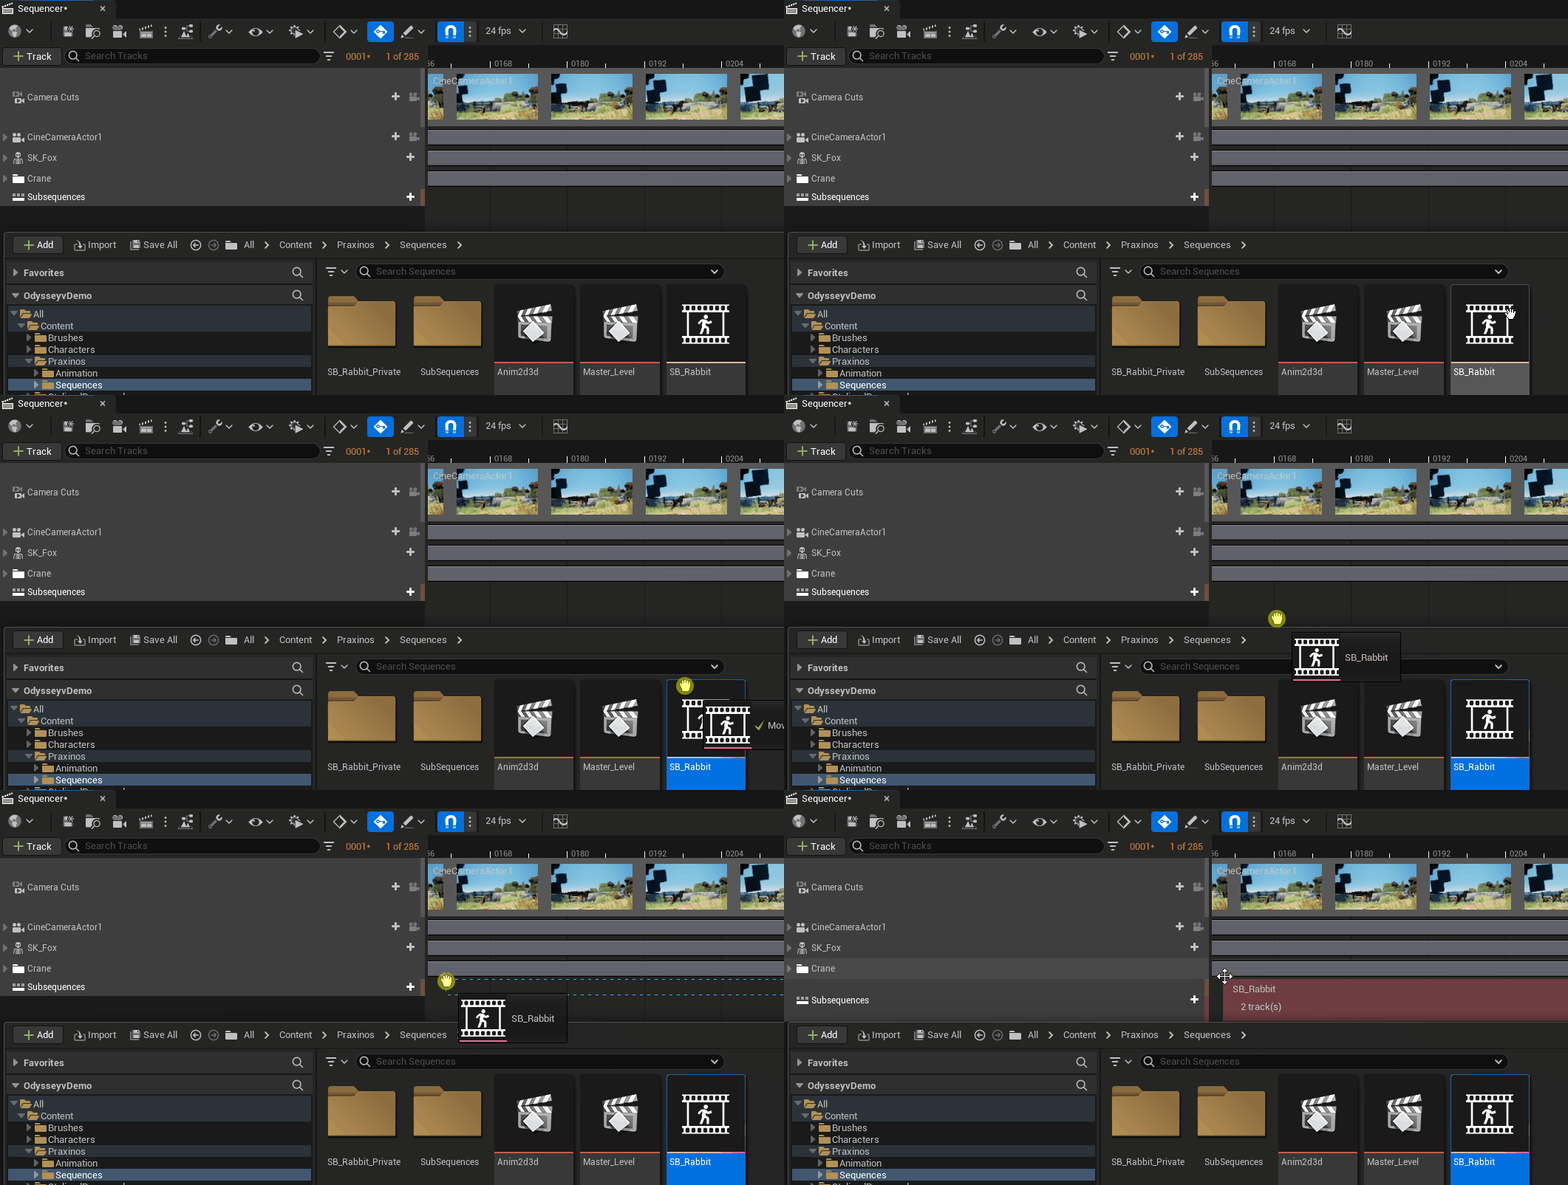
Just like Shot Track, only Level Sequences can be added in Subsequence Tracks by default. To add a Board or Shot Sequence, you must first add a Subsequence Track, then drag and drop the Board / Shot Sequence in the Timeline area.
Note
For more details about Subsequence Tracks, we advise you to read this documentation on Unreal Engine.
Fade Track#
Fade Track is used to create fade in and out on a scene thanks to keys.
Note
For more details about Fade Tracks, we advise you to read this documentation on Unreal Engine.
Level Visibility Track#
Note
To better understand this section, you must know what a Level is and how to use multiple Levels at the same time. To do so, please read this lesson about Levels.
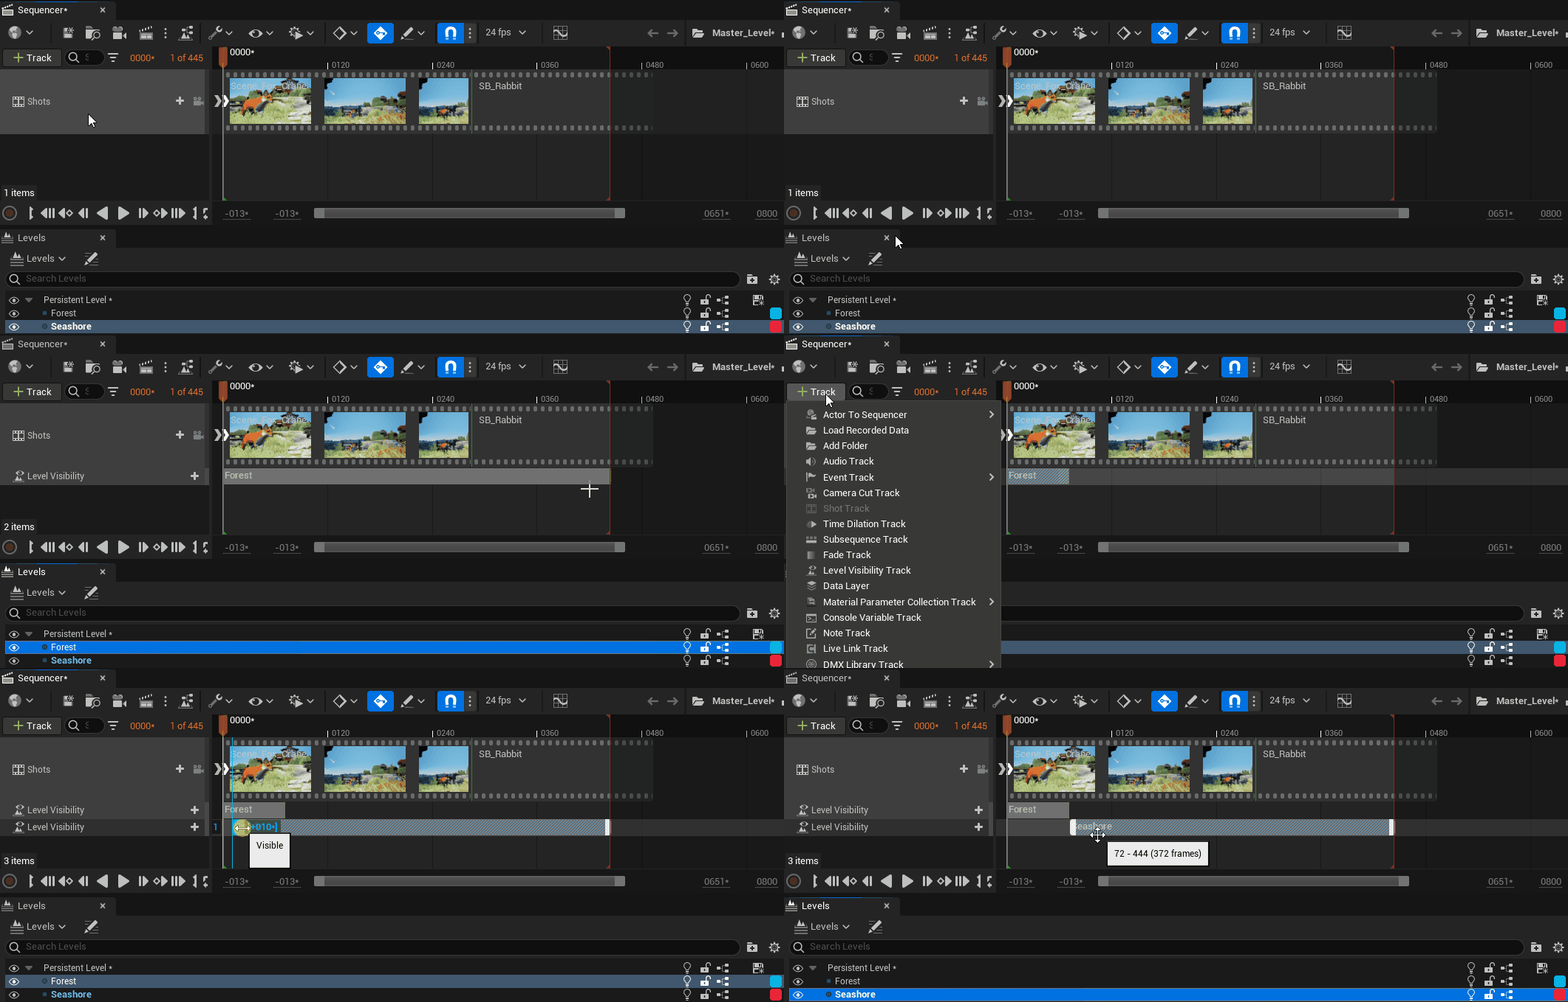
Level Visibility Tracks are absolutely necessary to combine or use several 3d environments at the same time. It can be used to:
switch between several separated environments which belong to the same scene (example: a character moves from a house to a train station);
combine Levels with additional actors (example: an empty Level with a rough storyboard and a Level with the actual 3d scene).
Level Visibility Tracks are also mandatory before rendering a sequence as a video file.
Note
You will find a use case for Level Visibility Tracks in the lesson about Working with multiple Levels.
Media Track#
Originally, Media Tracks were used to display an external image sequence or video into a Level. The process needed:
A Level with a Static Mesh (Plane, Cube…)
An asset “Media Texture”
A Material using this Media Texture and applied to the Static Mesh
An asset “Media Source” to find the external source as an image sequence or a video file
A Level Sequence with a Media Track, whose the properties set what Media Texture and what Media source are in use
The whole process is explained in details in Unreal Engine 5.8 documentation.
With Unreal Engine 5, Epic Games introduced a new type of actor named “Media Plates” which is much easier to use, especially for video footage. To create a Media Plate:
Drag a video footage and drop it into the Content Browser to create an asset Media Source.
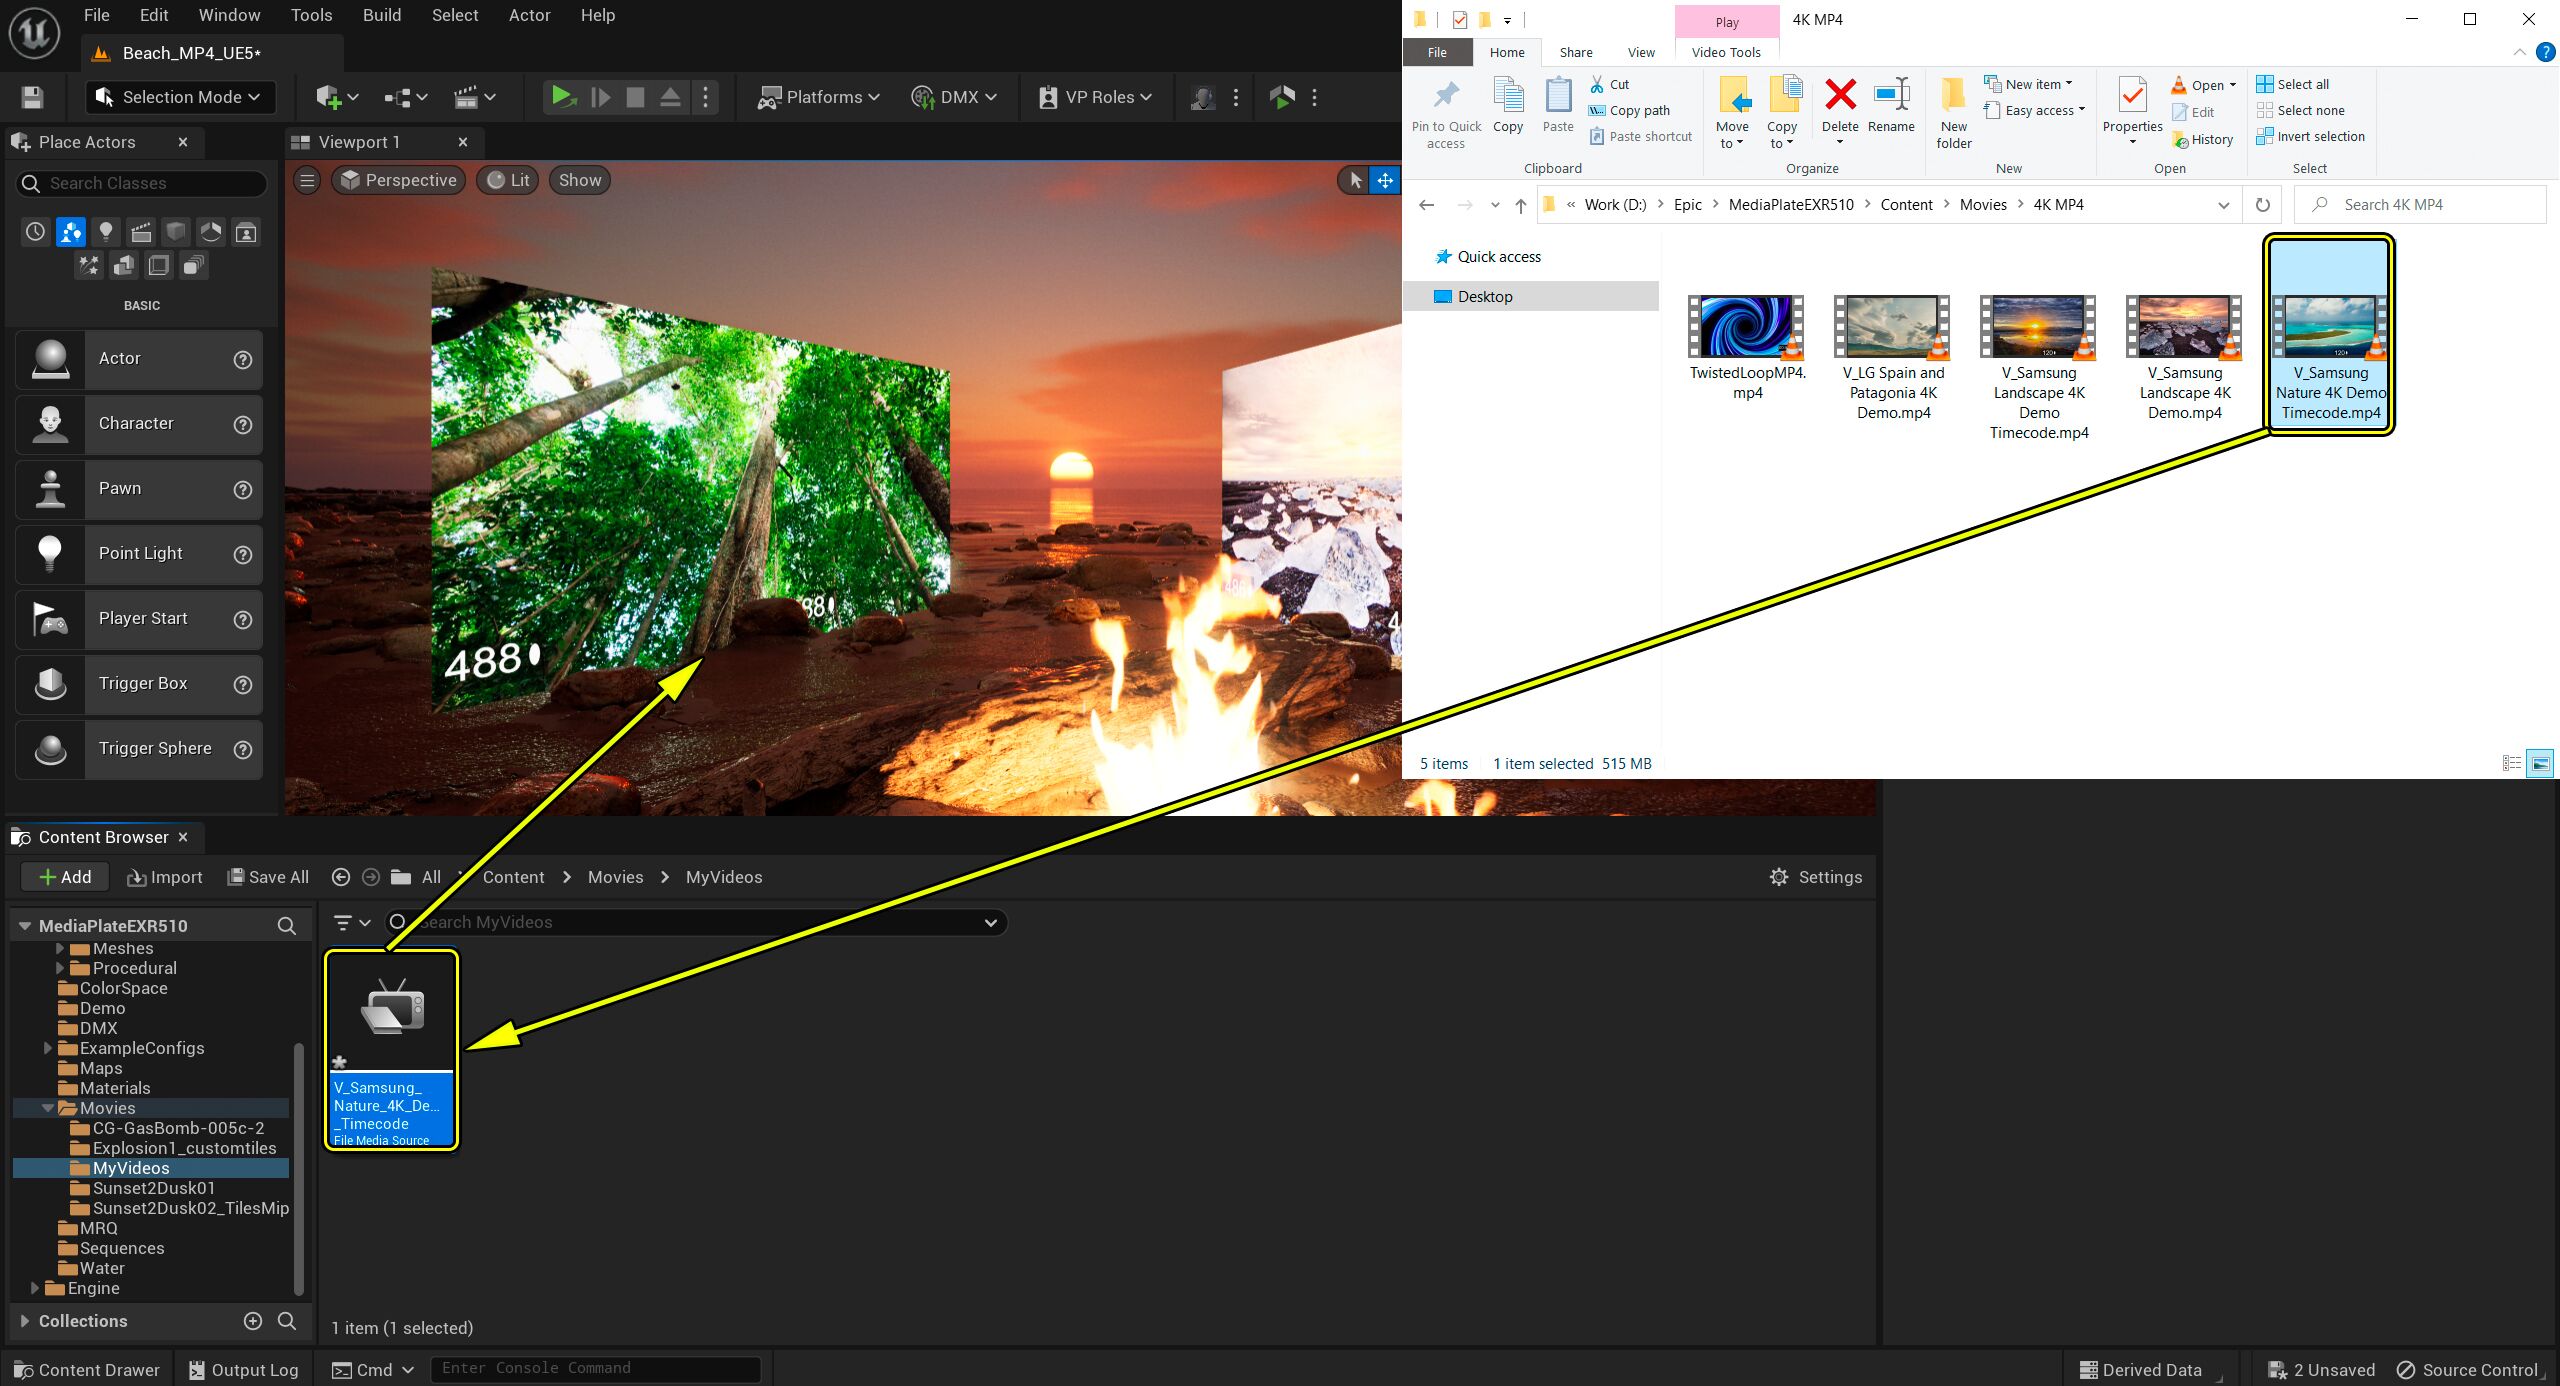
Drag this asset Media Source and drop it into the Level. It will create a Media Plate that looks like a black Plane Actor.
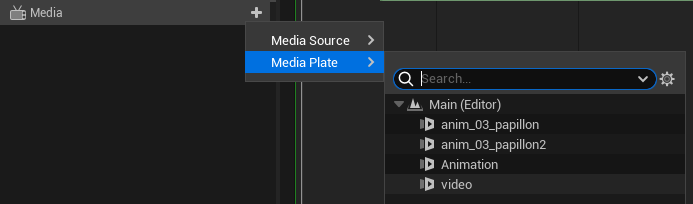
In your Level Sequence, create a Media Track, then bind it to the Media Plate.
In Odyssey, Animation assets are considered as Media Source, which means you can easily drag and drop your 2d animation in a Level, and bind it to a Level Sequence:
Note
For more information about combining 2d animations in a 3d context, please read this lesson. For more information about Media Plates, please read Unreal Engine documentation.
Note Tracks#
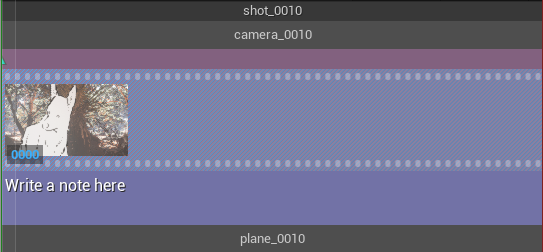
Note Tracks can be used with Board and Shot Sequences only.
Note
Please read this lesson to know everything about Note Tracks.
Spawnable VS Possessable Actor Tracks#
Unreal Engine offers different ways to manage tracks. We will study 2 most used modes: “Spawnable” and “Possessable”.
Possessable Actors#
By default, any Actors added to a Level Sequence is turned into a Possessable Actor Tracks.
A Possessable Actor Track means the Actor belongs to the Level. They physically always present in the scene, even if no Level Sequence is in use.
For instance, this chair is always visible in the Level:
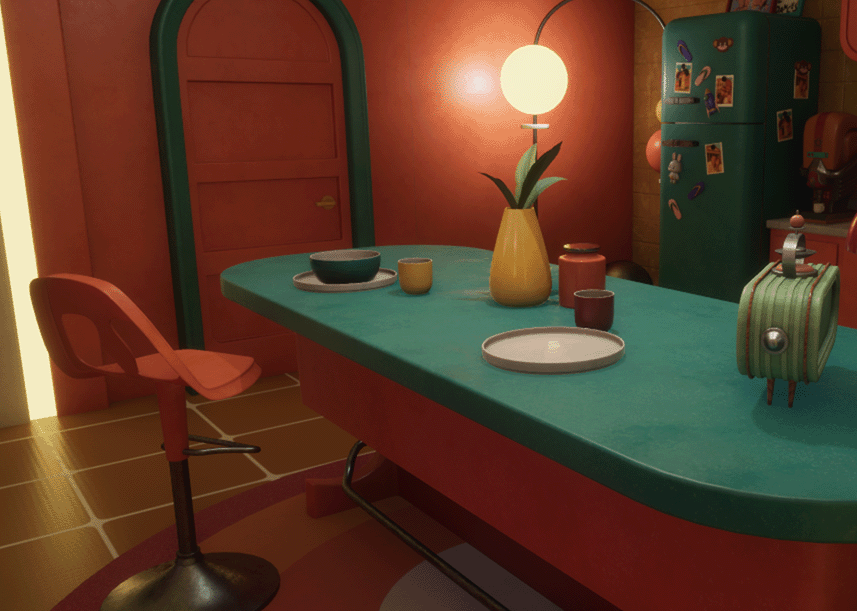
If we add it to a Level Sequence with a Transform Track, this will change its position in the Level. However, if we delete the Actor Track from the Level Sequence or if we close the Level Sequence, the chair will get back to its original position in the Level.
Warning
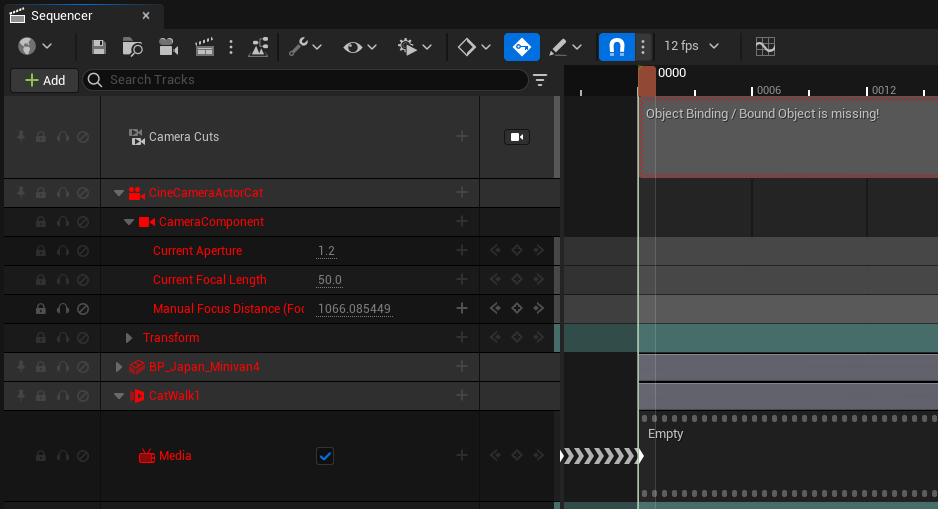
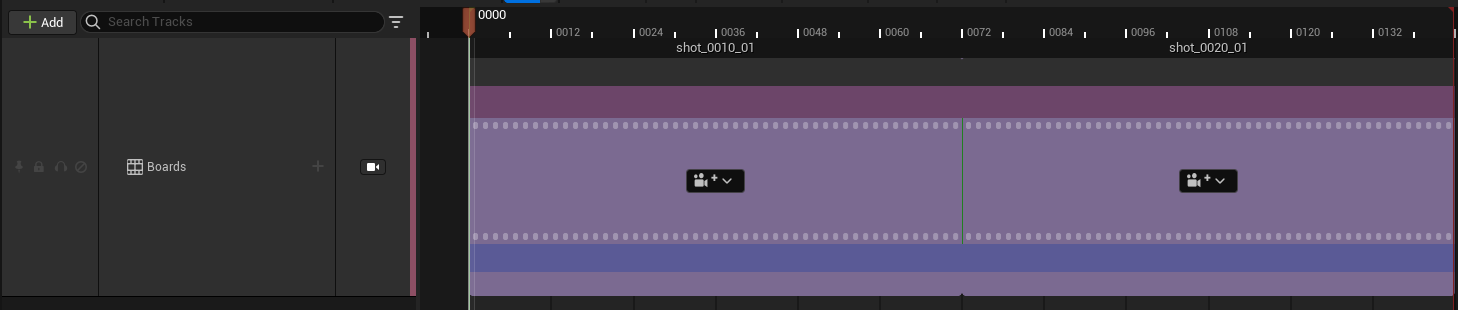
When using Possessable Actor Tracks, you must always load the Level first, before opening the sequence. If you don’t, you will see empty red tracks in the Sequencer:
Spawnable Actors#
A Spawnable Actor Track is usually a Possessable Actor Track whose the binding was changed. It is symbolized in the stack and in the Level Outliner by a light bolt.
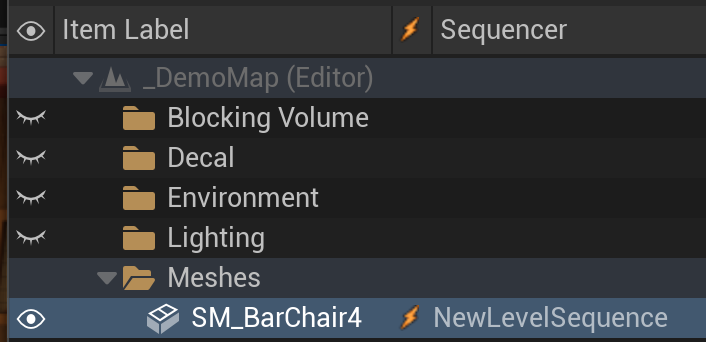
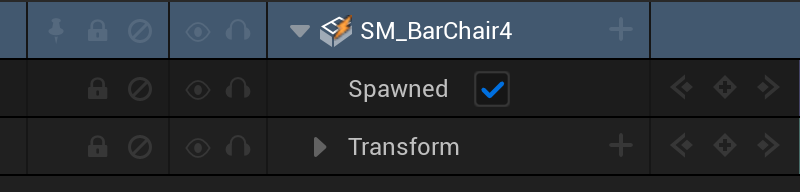
A Spawnable Actor Track belongs to the Level Sequence. It is spawned (visible) only when the Level Sequence it is bound to is active. When the Level Sequence is closed, the Actor disappears from the scene and won’t be listed anymore in the Level Outliner.
It also means that if a Spawnable Actor Track is removed from a Level Sequence, it will be definitely gone from the scene.
Spawnable actors should be used for elements that are not meant to last forever in the scene. It especially applies to Cine Camera Actors, to Animation 2D Actors, but also to 3D characters to be animated.
This will save place and ressources on your computer, since only the elements you need will be loaded.
Tip
Combine Spawnable Actors with Multiple Levels and Level Visibility Tracks for an efficient workflow!
Change binding#
Using Spawnable or Possessable binding can be chosen when right clicking on an Actor Track:
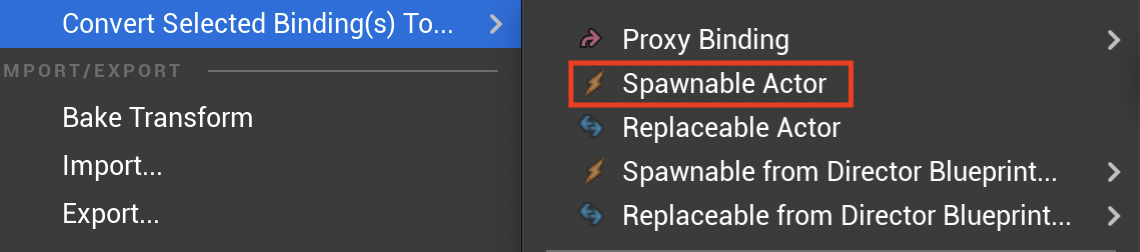
This Possessable Actor Track can be turned into a Spawnable Actor Track#
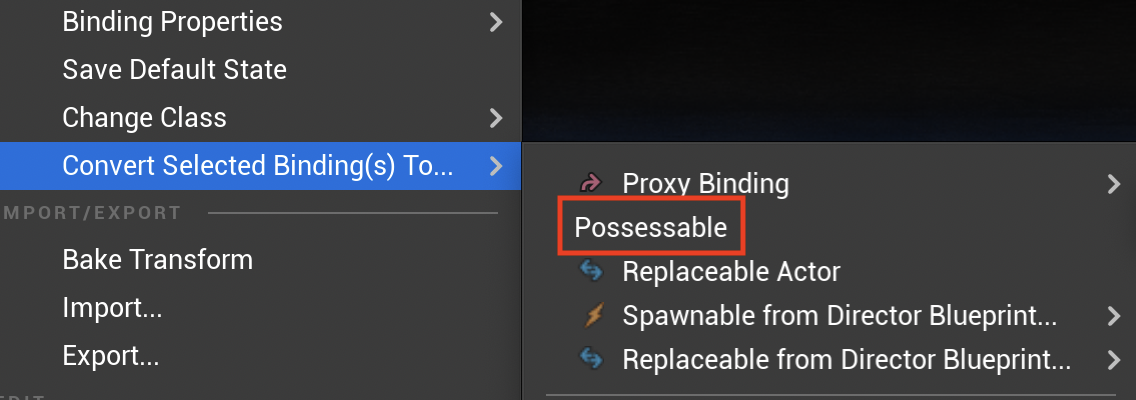
This Spawnable Actor Track can be turned into a Possesable Actor Track#